Singapore Passport Photo Guide: ICA Compliance & DIY Tips
A comprehensive guide to mastering Singapore ICA passport and ID photo requirements for 2024/2025. This technical deep dive covers biometric standards, DIY lighting setups, newborn photo hacks, and how to use AI validation to ensure a 100% success rate for your application.
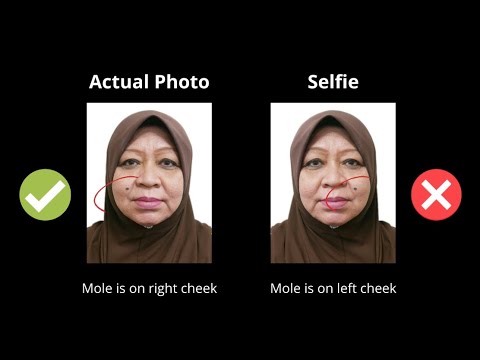
You’ve finally cleared your schedule to renew your Singapore passport. You log into the ICA portal with your Singpass, glide through the personal details, and reach the final hurdle: the photo upload. You upload a shot taken at a neighborhood studio, only for the system to flag it instantly. Or worse, you submit it, pay your $70, and get a rejection email three days later. \n\nWhy does this happen so often? In 2024 and 2025, the ICA’s automated facial recognition systems are more sensitive than ever. They aren't looking for a 'nice' photo; they’re looking for a data-rich biometric map of your face. If your hair obscures your eyebrows or a studio light creates a tiny shadow under your nose, the algorithm fails, and your application stalls. Using a reliable passport photo app can help bridge the gap between a casual selfie and a technically perfect biometric document.\n\n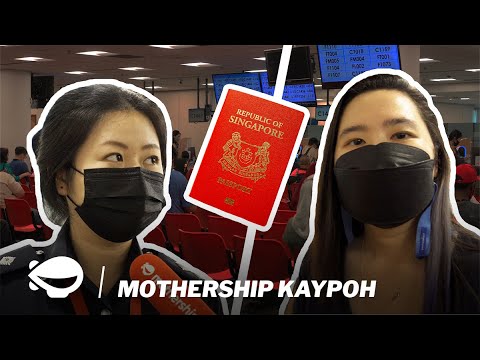 \n\n## The Technical Blueprint: 35mm x 45mm and Beyond\n\nTo pass the ICA’s vetting process, your photo needs to be a technical document masquerading as a simple portrait. Let's look at the numbers that actually matter for your sg passport photo size.\n\n### The 32mm–36mm Rule: Where Most DIYs Fail\n\nWhile the overall photo size must be 35mm wide by 45mm high, the internal ratios are the real gatekeepers. According to the ICA’s official guidelines, your head must measure between 32mm and 36mm from the crown (top of the head) to the chin. \n\nMany DIY photos fail here because the subject is either too close—making the head too large—or too far away, leaving too much 'dead space' above them. If you’re uploading a digital file, aim for a resolution of at least 600 dpi. The ICA uploader has a built-in cropping tool, but it only works if your original image has enough 'padding' for the AI to find and center your face accurately.\n\n### The Eyebrow Arch: The AI’s Favorite Data Point\n\nThis is the part most people ignore. Your eyebrows are critical biometric markers. If you have long bangs or a fringe that covers your eyebrow arches, your photo is headed for the rejection pile. The ica passport photo requirement mandates that your eyes and eyebrows be clearly visible. \n\nDon’t try to look too 'glamorous.' A neutral expression isn't just a suggestion; it’s a requirement. No showing teeth, no squinting, and no raised eyebrows. You want your face in its most 'measurable' state. Also, if you wear glasses, make sure there’s zero reflection on the lenses. Honestly? It’s usually easier to just take them off. The ICA doesn't mind if you wear glasses in daily life but skip them in your passport photo, as the AI focuses on the eye structure itself.\n\n## Why 'Professional' Studios Can Lead to Rejections\n\nWe’re conditioned to think a passport photo shop near me is the safest bet. However, there’s a rising trend of studio-taken photos being rejected. The reason is simple: many photographers still apply 'artistic' principles to a technical document.\n\n### The Danger of Soft Lighting and Photoshop\n\nStudio photographers love soft lighting and 'rim lighting.' These are great for LinkedIn headshots because they hide wrinkles. But for the ICA, soft lighting often creates 'micro-shadows' in the eye sockets or under the nose. These shadows confuse the facial recognition software.\n\nFurthermore, many studios offer 'complimentary retouching.' If they smooth out your skin too much or adjust your jawline, they are effectively deleting the biometric data the ICA needs. If the digital signature of your face is altered by Photoshop, it won't match the live scan at the airport. A raw, well-lit smartphone photo processed through a dedicated passport size photo editor often has a higher success rate than a heavily edited studio shot.\n\n
 \n\n## The Smartphone Masterclass: DIY Like a Pro\n\nYou don’t need a $2,000 DSLR. Your modern smartphone has more than enough megapixels. The secret lies in your environment and how you make passport size photo online free using advanced tools.\n\n### The 10 AM Window Rule: Free High-End Lighting\n\nLighting is 90% of the battle. Avoid the 'top-down' lights in your HDB flat; they create harsh shadows under your eyes (the dreaded 'raccoon eyes'). Instead, use natural light. \n\nFind a window between 10:00 AM and 3:00 PM when the light is bright but indirect. Stand about one meter away from the window, facing it directly. This creates 'flat lighting,' which fills in the crevices of your face and eliminates shadows. If one side of your face is brighter, have someone hold a white piece of cardboard or a towel on the dark side to reflect light back. It’s a classic photography trick that works wonders for compliance.\n\n### The White Wall vs. The 'Off-White' Trap\n\nICA requires a plain white background. But here’s the catch: many 'white' walls in Singapore homes are actually 'eggshell' or 'light cream.' To an AI, these can look grey or yellow, which reduces the contrast between you and the background. \n\nIf your wall isn't pure white, use a piece of white foam board or a freshly ironed white bedsheet. Make sure there are no wrinkles; a wrinkle creates a shadow, and a shadow is interpreted by the ICA system as an 'uneven background.' Modern free passport photo app options can often remove the background automatically, but starting with a clean, well-lit surface is always best.\n\n## The Newborn Challenge: Getting it Right for Infants\n\nTaking a newborn passport photo is arguably the most stressful task for new parents. How do you get a two-month-old to look at a camera with a neutral expression while keeping your hands out of the frame? \n\n### The Flat-Lay Technique\n\nDon’t try to prop your baby up. It’s a recipe for shadows and frustration. Instead, use the flat-lay method. Lay a white sheet on a firm mattress or the floor near a large window. Place the baby on the sheet and take the photo from directly above.\n\nTo get them to look at the lens, use a rattle or a high-contrast toy held right next to the phone. The ICA allows for some leniency with infants—they don’t expect a perfect neutral expression—but the eyes must be open, and there should be no hands or toys in the frame. For more complex cases, the ICA website provides additional visual examples for minor subjects.\n\n## The 'Hidden' Rejection: Digital Compression\n\nHere’s something most guides miss: how you move the photo from your phone to your computer matters. If you take a perfect photo and then WhatsApp it to yourself, the app will compress the file, stripping out the metadata and lowering the DPI. When you upload that to the ICA, it will be rejected for 'poor image quality' or 'low resolution,' even if it looks fine on your screen. \n\nAlways use AirDrop, a direct USB cable, or email it as an 'Actual Size' attachment to preserve the original file quality.\n\n## Beyond Singapore: Malaysia, US, and Regional Nuances\n\nIf you're an expat in Singapore or a local planning a big trip, don't assume one size fits all. \n\n* Malaysia: While the MyOnline Passport system now uses white backgrounds for many renewals, some physical visa categories still require the traditional blue. Note the specific passport size photo malaysia dimensions which may vary for non-ICA submissions.\n* USA: The requirements are notoriously strict. The photo must be a perfect square (2x2 inches) and the US Department of State Photo Tool is very particular about the 'head height' within that square.\n* International Standards: Most countries follow the ISO/IEC 19794-5 biometric standard, which defines the mathematical points on a face that must be identifiable.\n\n## AI Validation: Why Human Eyes Aren’t Enough\n\nIn the past, we relied on a studio photographer's 'experience.' But a photographer doesn't know the latest algorithm update at the ICA. AI-powered editors, like IC Photo Singapore, use the same logic as the immigration systems. They check for pixel-level compliance, background hex codes, and facial symmetry before you ever hit 'submit.'\n\nUsing a dedicated passport photo maker isn't just about saving $20; it’s about peace of mind. When an app tells you your photo is compliant, it’s because it has run a checklist of hundreds of ICA-specific parameters that a human eye would simply miss. Mastering your passport photo is about understanding that you are creating a digital key. By focusing on the physics of lighting and the geometry of your face, you ensure your next travel experience starts with a successful upload, not a rejection notice.\n\n## Frequently Asked Questions\n\n### What is the exact Singapore passport photo size?\nThe required size is 35mm wide by 45mm high. However, the most critical part is the head size, which must be between 32mm and 36mm from the crown to the chin.\n\n### Can I use a free passport photo app for ICA?\nYes, you can use a passport photo app to take and edit your photo at home. Ensure the app performs a technical compliance check to avoid rejections based on lighting or background issues.\n\n### Why was my passport photo rejected by ICA?\nCommon reasons include hair covering the eyebrows, reflections on glasses, uneven background lighting, or low resolution caused by digital compression (e.g., sending the photo via WhatsApp).\n\n### Do newborns need a passport photo?\nYes, infants require their own passport photo. The "flat-lay" technique is the most effective way to take a newborn passport photo that meets ICA standards while ensuring the child is comfortable.\n\n### Where can I find a passport photo shop near me?\nWhile many retail shops offer passport services, an online passport size photo editor often provides more precise biometric checking for the current ICA automated systems.
Ready to Create Your Photo?
Get your perfect passport, IC, or visa photo in minutes. AI-powered, ICA-compliant, instant download.
Create Your Photo Now